Showing posts with label tutorial. Show all posts

Tuesday, September 6, 2011

Double Sided Flower Dish Scrubby Pattern


Materials
100% Cotton Yarn
Nylon Netting (2" strip approx. 7 yds.)
J Hook
G Hook
Yarn Needle


For Nylon Scrubby (make first):
With larger hook and your long strip of nylon netting, ch 4 and join to make loop.
RND 1: Ch 3 (counts as first dc) and dc 11Xs around (for 12 dc). Join with slip stitch in top of ch 3.

RND 2: Ch 3 (Counts as first dc) dc in same space, 2 dc in each space between dcs of rnd 1 (24 dc). End off, no tail required.

For Flower:
Using smaller hook and cotton yarn, chain 3 and join in first chain to make foundation loop.

Rnd 1:
Ch 2 (count as first sc), sc 7 times in center of loop, join in top of ch2 (8 sc).


Rnd 2: ch 2, sc in same stitch, 2 sc in each stitch around (16 total).


Rnd 3: ch 4, *skip 1 sc, sc in next sc (I go through both back and front part of the stitch), ch 3* Repeat from * around ending with a ch 3 which you will join with a slip stitch in the 2nd ch from the first ch 4. (you should have 8 loopies for your petals).


Rnd 4: in each loop around: sc, hdc, dc, hdc, sc


Rnd 5: fold petals forward, 2 slip stitches down back to get to the base of the petals (rnd 2). sc in middle stitch (this is the one you skipped in between your ch 3s in rnd 3), and ch 3, then sc in the middle stitch of the next base, repeat around, joining your last ch 3 into the firs sc you did for this round. (You should have 8 new loopies for the back row of flower petals).

*here is how I slip down the back


*here is the view of the stitch I am going through from both the front and back of the flower:

*and here is the back side of the flower once all the loops made in this round are completed:


Rnd 6: in each petal loop around, sc, hdc, dc, tr, dc, hdc,sc (8 times). Slip stitch in the sc of the first petal. Don't cut or bind off!


NOW you are going to sc around the perimeter of your nylon scrubby circle (24 sc.) When you are done with that, tie off leaving a tail long enough to sew the two together


using yarn needle and working along the crocheted perimeter of the nylon, sew the two pieces together, end off and weave in ends.


And there you have it: cute and functional dish scrubby!

Todays Creative Blog


Tuesday, July 12, 2011

surprise ball

This seemingly simple concept was totally unknown to me just a few weeks ago. When I stumbled across the idea over @ O Happy Day, I went nuts for it!!! What a fun idea!!! I love love love buying pointless unique little oddities as gifts and this added a whole new fantastic element! I made one for my hubby for our anniversary, and this one was for my baby brother's 21st birthday :)

They're super easy, and the fun part (although it's all pretty fun!) is finding all the little gifts to tuck inside!

I know you don't really need a tutorial for this, but just in case you wanted to see how it all comes together, then you can :)

What you need:

small-ish gifts, or at least flexible ones and at least 10, but it really doesn't matter
crepe paper streamers, the more colors the better!
a label or sticker to hold it all together
a tiny 3 year old helper! (not really, but this is the second one I made, and having her hold the roll of crepe paper while I pulled at it really made the WORLD of a difference in terms of getting twisted and tangled up!)


it only makes sense to me to have the main present in the inner most layer of the ball. in this case, it was a gift card. So you just start wrapping. I use one color per gift and just wrap wrap wrap and roll it some more :) Keep in mind you're ultimate goal is a ball-ish shape.
When you're done wrapping the first gift, just cut the paper and get ready for your next gift. You don't tape it down or anything, just hold it taught until you've wrapped your first layer or two of the next gift. Hold the wrapped and unwrapped gift close together and start wrapping! It's like a big colorful snowball that keeps eating up fun little presents!

Each time you add a gift, try and put it anywhere you might kind of need some extra volume to get your spherical shape.

Towards the end, you can start using big flatish gifts as long as their flexible (sticker sheets, small color books, etc.)
After my last gift, I cut some decorative strips of all the colors just to make the outside pretty and secured it with a name tag (because it was the biggest sticker I had).

Even funner than making these is watching someone unwrap them :) Miss Y was so excited to see uncle open his present that she made him do it right at the beginning of the party :)

Finish it off with a kiss for the helper :)
Todays Creative Blog

Monday, November 16, 2009

Child's Hooded Fleece Scarf Tutorial


This is not my original idea, but it's been so fun and easy to have such a simple project that can use up all this random fleece I bought probably a hundred years ago!

I knocked out 6 of these this weekend, and found it easiest to make them in groups of three so my instructions are for a triple attack of hooded fleece fun! :)

Supplies:
I found that it took a 25 inch length of fleece to make 3 child-sized hooded scarves (without pompoms)
Sewing Machine
Rotary cutter (you don't have to have this, but wow it makes cutting long strips easier!)

Basically you are attaching 9ish by 8 ish inch hood (finished size, it comes out to about 10"x10" before sewing) to a 5ish by width of the fabric scarf in an "L" shape, but here's the breakdown:

Instructions:
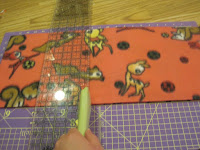
Cutting - with your fleece folded in half cut a 10 inch strip off the top (this will become your three hoods).
You need to cut this 10 inch piece into 3 hoods, and you can either a) unfold the strip and cut it into three equal pieces (this means you'll use a rectangle for the hood which will result in a folded edge at the back of the hood instead of a sewn one) or b)-which is shown below-keep strip folded and cut it into 3rds (this means you'll use 2 squares for each hood at least for two of them as your last set could be left a rectangle with a fold rather than a seem) either way works, I actually prefer the separate squares for the hood.
Next, cut the remaining fleece into three 5" strips that are the width of the fleece (your scarves).


Sewing the Hood- If you opted for three long pieces out of your 10 inch strip, all you need to do is fold it in half so the fold is along the left side (or right, i guess it doesn't really matter :P),

pin across the top
and sew a 3/8" seam across that top edge. If you opted for the 2 separate squares hoods,
you just pin across the one side AND the top
and sew a 3/8" seam across the one side and top.
Next you want to fold over the open side of the hood (the part that will encircle the face) to create a nice finished edge. I folded in about an inch and a half to two inches.
Making sure the seam is pinned open, pin down both sides and sew about 5/8" in from the folded hem.
I then sewed another seam just lining up the edge of the presser foot on the first seam.

If there is a considerable leftover flap of fleece, you can trim it down close to the seam.


Sewing the hood to the scarf-fold the scarf in half to find the middle and mark with a pin, then with right sides together, match up the middle of the scarf with the middle back of the hood and begin pinning from the middle out towards both sides.
All you have to do is sew the length of the hood to the scarf
and voila! you're done . . . mostly, unless you want a pompom

fleece pom pom (no pics, sorry!)-I wasn't overly impressed with my fleece pom pom, but here's how i did it anyways :) haha. I cut one more 5" strip (another scarf essentially) and then cut that into short little 1 inch strips. Then I gathered about a third of them, tied them in the middle with some yarn and foofed them. This makes a rather large pom pom, so my next one, I cut the strips in half (2 1/2" X 1") and I liked that pom pom better, but still, pompom conesoure as I am, they were not awesome :) hahaha I think the hood looks ADORABLE just with it's pointy little pixie look without a pom pom. Either way!


They really are pretty simple, and I've seen some fabulous ones using a cute cotton or flannel on the outside and lined with fleece on the inside, but I just love the easy-ness of these ones :) Don't feel like going to the trouble? I have a few up at YoriSparrow for $12 each