This is not my original idea, but it's been so fun and easy to have such a simple project that can use up all this random fleece I bought probably a hundred years ago!
I knocked out 6 of these this weekend, and found it easiest to make them in groups of three so my instructions are for a triple attack of hooded fleece fun! :)
Supplies:
I found that it took a 25 inch length of fleece to make 3 child-sized hooded scarves (without pompoms)
Sewing Machine
Rotary cutter (you don't have to have this, but wow it makes cutting long strips easier!)
Basically you are attaching 9ish by 8 ish inch hood (finished size, it comes out to about 10"x10" before sewing) to a 5ish by width of the fabric scarf in an "L" shape, but here's the breakdown:
Instructions:
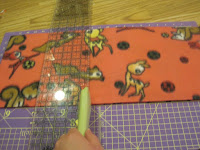
Cutting - with your fleece folded in half cut a 10 inch strip off the top (this will become your three hoods).You need to cut this 10 inch piece into 3 hoods, and you can either a) unfold the strip and cut it into three equal pieces (this means you'll use a rectangle for the hood which will result in a folded edge at the back of the hood instead of a sewn one) or b)-which is shown below-keep strip folded and cut it into 3rds (this means you'll use 2 squares for each hood at least for two of them as your last set could be left a rectangle with a fold rather than a seem) either way works, I actually prefer the separate squares for the hood.Next, cut the remaining fleece into three 5" strips that are the width of the fleece (your scarves).
Sewing the Hood- If you opted for three long pieces out of your 10 inch strip, all you need to do is fold it in half so the fold is along the left side (or right, i guess it doesn't really matter :P),

pin across the top
Next you want to fold over the open side of the hood (the part that will encircle the face) to create a nice finished edge. I folded in about an inch and a half to two inches.

Making sure the seam is pinned open, pin down both sides and sew about 5/8" in from the folded hem.
Sewing the hood to the scarf-fold the scarf in half to find the middle and mark with a pin, then with right sides together, match up the middle of the scarf with the middle back of the hood and begin pinning from the middle out towards both sides.
All you have to do is sew the length of the hood to the scarf
and voila! you're done . . . mostly, unless you want a pompom
fleece pom pom (no pics, sorry!)-I wasn't overly impressed with my fleece pom pom, but here's how i did it anyways :) haha. I cut one more 5" strip (another scarf essentially) and then cut that into short little 1 inch strips. Then I gathered about a third of them, tied them in the middle with some yarn and foofed them. This makes a rather large pom pom, so my next one, I cut the strips in half (2 1/2" X 1") and I liked that pom pom better, but still, pompom conesoure as I am, they were not awesome :) hahaha I think the hood looks ADORABLE just with it's pointy little pixie look without a pom pom. Either way!
They really are pretty simple, and I've seen some fabulous ones using a cute cotton or flannel on the outside and lined with fleece on the inside, but I just love the easy-ness of these ones :) Don't feel like going to the trouble? I have a few up at YoriSparrow for $12 each


2 comments:
what a cutie!
Cute!....I'm hosting a tutorial contest this month and you should enter if you're in the USA...there are some lovely prizes. :)
Post a Comment